For those unfamiliar with this film, here's the NSFW trailer:
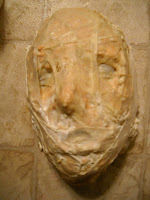
I showed the film to some friends and one of them, Kevin Polyak, instantly fell in love with it. He wondered if I was capable of producing a mask from this film for his Halloween costume. Basically a drunken gauntlet was thrown down in my mind and I was determined to make his challenge a reality. The mask he wanted was from a flashback sequence when a character is forced to duct tape their own ripped off face back onto their head.
 Reference Still from THE TAINT
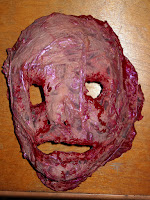
I decided to take the look of the mask a bit further. I brainstormed what this face would look like for the possible sequel to this film. I wanted to show the skin in a bloody, leathery state; contorted and disturbing. This would be my own version of Film Fan Art. What I envisioned was a cross between Freddy Kreuger, the Cropsey Maniac, Leslie Vernon and when actor Lou Perryman gets his face ripped of in TEXAS CHAINSAW MASSACRE II. Basically all the terribly wonderful things that delightfully taunt my imagination and memories.
I knew that this was going to be my first attempt at making a mask so I wanted it to be special, I wanted it to be custom, I wanted it to be one of a kind. I decided that I wasn't going to go about the traditional means of sculpting and pouring a mold. I was going to do a layer by layer build up of liquid latex from a Ultra-Cal casting of my own face.
I gobbed on the latex knowing it would take longer to dry this way, but give me a rippled foundation that I would make look like fat. It would be later that I would augment it further.
Here you can see the first layer dry. Not a bad start, very Toxic Avenger, but that's not what I was going for...
I had previously poured strips of liquid latex on my arm and as it dried, I would peel off these layers and stretch them over the face. I would definitely do thinner strips if I made this same mask the same way again, but that ship already sailed. Still it had a very distinct look versus if I had made it appear droopy and saggy. I wanted HUMAN BEEF JERKEY!
I filled in cracks and crevices with sponges and brushes, making sure not to lose the basic elements of the face underneath my half-cocked scheme of a technique. You have to make sure you have your ability to see, speak, and breathe with a mask, and if you know Kevin that means drinking too.
Here is the pull of the mask from the front view.....
.....and here is the back/inside of the mask.
I trimmed the edges with scissors to scale down some of my excess, but the idea was that this mask was to cover a good sized chunk of the face so I made sure there was a little extra along the top of the forehead and beneath the chin. My version of old school Trick 'r Treating theater if you will.
I started painting with pinks and purples, knowing that this would be the basis of what I would build and blend from in regards to shadow and composition.
I soon started adding more reds and browns to the mix, darkening certain areas and bringing the colors more to my liking.
To hold the mask in place I created a band from stretch elastic ribbon you can buy at any craft store. But I also wanted to hide this as well as utilize this necessity. I used grey Gaff tape, instead of Duct tape and folded it over top of itself and slipped the elastic through all the way around the mask. I chose the Gaff tape because it is porous enough to accept paint and aging where Duct tape would wipe right off.
A closer look shows how the "tape" hides the band.
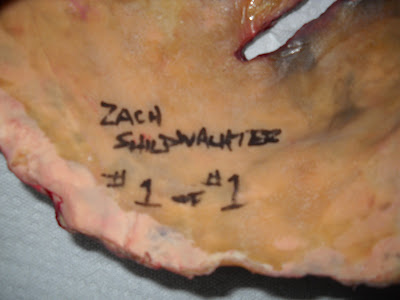
And like any good artist you have to make sure you sign your work. I probably would've stamped into the mask for this, but a black Sharpie has never failed me before.
Here are a few pics I would update Face Book with via my phone and the camera application Little Photo.
It was quite fun to see the changes the process took as this project came to a close. I learned several new techniques and ways to go about creating the look I want and how to avoid the look I don't want. I now plan on tackling the craft of mask making on a larger scale with a sculpt and mold in the near future to produce a limited run of original creations.
Kevin completely forgot that I had promised to make him this mask. It arrived just in time for him to enjoy the Halloween weekend and not be completely lame without a costume. And that's what you should walk away with if anything from this article; not wearing a costume on Halloween means you are super-mega lame. That and always keep your promises.
Here's a couple of pics of Kevin in all his glory Halloween weekend.
 |
| And you thought the rats were the scariest part of the NY Subway... |
 |
| Kevin and his special lady friend |
Now here's hoping that they do make a sequel to THE TAINT!!


No comments:
Post a Comment