Wednesday, October 28, 2009

Halloween - Ideas and Tips

So October 31st is quickly approaching, and I of course am waiting to the last minute to come up with a great idea. While the news of my undertaking these special effects make-up classes spread among my friends and family, I quickly became the de facto guy to ask for costume advice. A sucker for attention and not wanting to disappoint, I want to share some tips and ideas for my favorite holiday of the year.

I want to keep the focus on techniques, emerging technologies and inventive ideas. If you buy an entire costume for Halloween and have to tell people your a "sexy nurse" then keep on truckin'. Albert Einstein once said, "Imagination is more important than knowledge." Apply that to your scruples and your costume as I apply it to my learning and craft.


Special effects studio Tsuburaya Productions has released a Fully animatronic Gomora costume via Pink Tentacle.

Now imagine that coupled with this...


Combining technology in novelty ways is always entertaining, though I see one drunken friend with an overfilled keg cup completely ruining this costume.


A great idea requiring little bit of makeup, Roy Lichenstein-inspired real life comic book people.

Some face paint, properly applied dots, and bright bold colors. More info can be found by clicking here.

A great resource up those into DIY is Indy Mogul. This web show is dedicated to delivering cheap and practical effects for costumes and small budget films. This includes visual effects, editing, props and many other facets besides special effects make-up. They're supported by their viewers who often dictate what costumes and make-up builds should be made next. Sometimes I do think they let their "super time lapse" skip some important steps in many of their make-up builds, but the heart of any endeavor is in the experimentation. Their cousin site Thread Bangers is helpful in constructing costumes and clothing as well.

For B-Movie Becky, here's an example of a Devil/Demon build, that can easily be Hellboy or whatever you can imagine. Think of the endless possibilities just by changing the color of make-up used.


Now I'm always inspired by when form meets function. Now these are pretty rad...


But when thinking of this apply it for the greater good.


This is "Wearable Shelter" that is emergency protective gear. Imagine if your local homeless shelter had this for those unfortunate to not have homes to hand out candy. More info and pics can be found here.

The most exciting tutorial I've found All Things Horror is a video from a fellow classmate Jacqueline Olszewski. She outlines all the steps needed to make one of the best zombies I've seen in quite a while. You can follow her YouTube channel here.


Here's another video of her applying a full face zombie utilizing liquid latex and some of the techniques mentioned with burns and scars. A great job with maximum effect.


I hope this serves as a brief source of inspiration. I find myself googling images and YouTubing for inspiration and how-to's more so than when I should be actually doing work. Research who did the effects on your favorite movies and TV shows. Find what companies they work for and where they got their training. It helps to see where others have been to see where they're going. One day this will be said of you too, if not already.

If you don't have any plans for the 31st quite yet, click here.

Tuesday, October 27, 2009

Kit Day - Paint-On Scars, Bruises, and Burns

So for our 3rd class we received our start make-up effects kits! This was to happen last week, but was postponed with a lesson in life casting since a model became available for the lesson. But for our 3rd class we jumped right into making paint on effects directly from our kits. These effects are great for spur of the moment looks called for on set in the heat of the moment.


Here's all the goodies ready to be divied out like Trick 'R Treat.

This is mine, all MINE! Included is 3 packs of Alcone sponges, a bottle of ProsAid, Ben Nye's BOND OFF!, and a powder brush.

These are the brushes we received. One wide, two medium, two long tips, and one fine tip. Now don't go thinking you can pinch a penny by buying regular paint brushes from your local art store. Most of the animal hair that is used to make paint brushes is preserved with formaldehyde to retard deterioration. Formaldehyde is a known carcinogen and with prolonged exposure comes an increased risk of health risks when exposed to your skin. So Scrooge McDuck, spend a little extra for quality AND safety.

Each student received a "Rainbow" wheel (all the primary colors), a "Death" wheel (including green, grey, yellow, brown), a "Concealer" wheel (natural skin tones) and a flat White/Creme all from Ben Nye, who specializes in theater and film make-up. From these wheels you can blend a multitude of colors for whatever look you're designing. They usually retail for between $12-15 each, depending on size and colors. When I refer to paint throughout this post, please remember I mean make-up & cosmetic products.

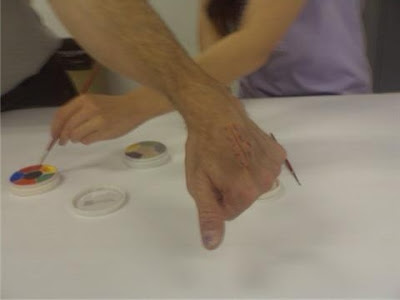
Carl began by showing us the basics of a paint-on scar. Everything seen is strictly make-up blended on skin to create a simple and quick illusion of an open & bruised wound. He also had an assistant do a build up of her own to demonstrate the different techniques for varying skin tones and body structures.

The key is blending color and playing with shadow. The finesse comes from knowing when to STOP. Over blending drowns out the color and kills the believability.

We start with a fine point brush and paint a line on our hand. Taper off the edges to blend to the skin. Take caution in this as overextending may make your wound longer and larger than intended. Leave roughly a centimeter or two on each side of this line, and don't touch it with any paint. This clear area will create the appearance of raised tissue with proper blending later on. Random patterns of Red and Blue dots, stippled along the red line drawn on your build the base for your bruising. Stippling is light dabbing with your medium sized brush. Stipple with one and blend with the other. Don't mix up the two brushes as one will be more concentrated with your make-up.

Using the other medium brush you did NOT stipple with, begin to blend the red and blue into patches of bruised purple. Make sure to blend AWAY from the red line you drew on your hand. Remember dark recedes, light comes forward. Do this on both sides and blend as far as you feel comfortable. Note the curvature of your knuckles and veins and utilize their shape to your advantage.

Blend in the random patterns you created. Remember to stipple and turn your brush. If one area isn't dark enough, add more color. If one area becomes too dark, smudge some of it off with a paper towel and reapply.

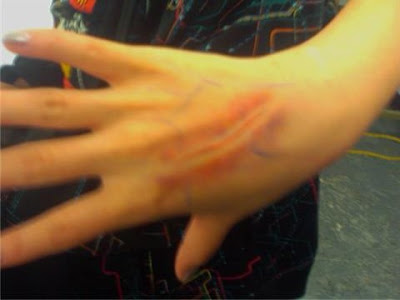
Here you can see the faint lines of blue added and feathered out along the hand to resemble veins. Subdued, but very effective.

By adding and blending a bit of yellow at the farthest ends of the bruising, it creates a sense of healing and believability. By again taking your fine point brush and cleaning off the red, a cross hatch of black lines creates the illusion of stitches. A touch of powder takes down any shine and Viola!
Now my turn...

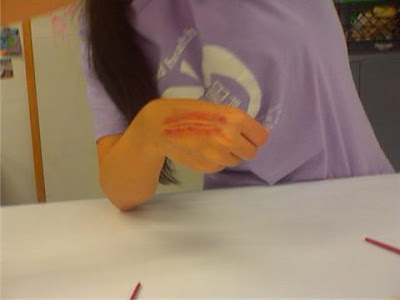
Here I start with my red line across the back of my hand. Softly trace a darker red or a bit of black along one side of that line to add an element of depth you won't find with just one color. You can somewhat see some of the red I've begun to stipple on for bruising.

After the red, I stipple on blue, in about as random pattern as I can pick. I really wanted to go understated with this and try using less. I learned a valuable lesson in shading with our 3rd degree burns.

I begin to blend one side, feathering out away from the wound. I'm trying to concentrate on one side at a time to see what works and apply that same method to match the other side of my hand.

Here both sides are starting to match up nicely and generate a look of trauma. Very understated, but more can always be added alot more easily than taken away.

I decided to beef up a few spots by adding more red and a touch of purple. Great tip: Mix colors on your fingernails. They're like tiny pallettes you can instantly clean with a wipe of a paper towel.


The results are almost immediate. I made sure to work in the indentation between my knuckles, a place of natural bruising with an injury like this.

Please with this I added a touch of yellow. With my skin tone it began to come out a bit more like jaundice than a wound on the mend. I simply blended it a bit heavier and wiped off the undesired excess.

This is slightly better looking, especially around the wrist in my opinion. But it's lacking a key trait; VEINS.

With my fine point brush I paint and twist small root like patterns subtlety on my hand. With my skin tone I have to smudge them to feather them out and look a bit more believable. You don't want to take the blue on top of your bruising because the color with alter your pattern. Instead bring it up to it and feather out further into yellow paint terrain.

With my stitches I experimented with a half zig-zag. Not the greatest, but I'll be consulting a physician's handbook from now on to see the proper way it should look. Note that bare area around the scar and how it looks as if it's raised. All make-up, my friends, and knowing where NOT to put it.

Our latex burns are the simplest effect on the planet. First, please make sure you're not applying this to yourself or anyone else that has a latex allergy.

Think back to elementary school, when you would take the Elmer's glue and slather it on your skin to dry and peel it off like you were a snake. This is the same technique.

Apply 2-3 coats of liquid latex by stippling with a torn sponge. By tearing your sponge you're creating random patterns of texture that will blend to the skin. More coats equal stronger pull and more experimentation. The latex dries in less than 2 minutes so you have time to go for it.

You can scratch at it, tug with the back of your paint brush, whatever, but the level of agitation determines the severity of the effect. This can go from a simply sun burn to a bit more gruesome with a touch of magic and paint.

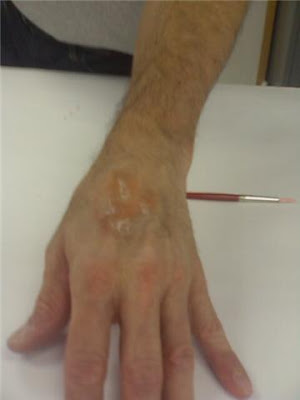
Here I applied 3 coats to the back of my recently cleaned hand. I cleaned my hand from the scar paint up in less than 30 seconds with a baby wipe or wet paper towel.

The latex will dry clear and will no longer be tacky to the touch. Don't use the same sponge to reapply another layer as the dried latex on your sponge will ball up and leave unwanted bits of material on your effect. The more you stretch and hold your skin as it dries with the liquid latex, the more wrinkles it will created once that tension is released. This is important to know when using liquid latex for old age make-up.

A tug here, a scratch here and it looks like I was scalded by boiling water. But I can't stop there...

I busted out some of my red and orange and my neutral tones to create the "I think the microwave is broken" hand. I tugged at the bubbles in the latex and stretched them out. By adding more layers it allowed for the give to actually use the tips of my bruises to lift up from the inside of my hand.

I stippled a red, and orange and a tiny tiny speck of blue in the larger holes and blended with my other brush. I used the neutral tones to take down the sheer flaky whiteness that is the residual effects of dried, peeled latex, but I could've easily left it as is.

Carl then had time to show us a quick build up mold using platinum cured silicone. Applied directly to his assistant's arms the build is created by mixing the chemical compound together and oxygen does the rest of the work as it air cures.

Here he began to use a small putty knife to spread the material and smooth it to the arm. He attempted to create a knife/slash wound and a bullet hole.

The great thing with the material is it dries clear, though it can be mixed with pigment and bought in a variety of flesh tones. The tricky part is, who's flesh tone is it? When working with a model you want to start and finish and not spend the majority of your time trying to match their ethnicity. Usually this product cures in 30 minutes, but there's always varying factors for sooner or later. Here the cool body temperature of our model wouldn't permit the material to kick within the allotted time. You'll know it's not ready because it's still tacky and gel like.

Carl did add a splash of color to show how once the material is dry, can be painted and dressed like any silicone appliance.

Now with the exception of the latex for the burn, almost all this applications are safe for yourself and others. The key is to not be afraid to make a mistake; this stuff washes off. Experiment with colors and blending. Study shadow and structure. These fundamental techniques I feel will greatly serve the work I already have brewing inside my noggin. I'm learning that exerimentation is fun and the more you faulter, the more you can learn from your mistakes.

Tuesday, October 20, 2009

Life Casts - Making an Impression

So last Monday, class was cancelled due to observation of Columbus Day. Heading into our 2nd session, we were all under the impression that we were to begin learning scars and bruising from the make-up kits that were going to be issued to us. Low and behold, our Quarterback Carl called an audible as our classmate Kevin had brought along his wife Tam to serve as a model for a life casting demonstration.

A word of safety. I am no way completely trained in these techniques. This blog serves as a record and guide to my lessons. Please consult trained professionals before attempting any of these procedures. These materials and their improper use can cause serious harm. Please read all warnings and directions before using any of these materials. It helps to have the number to Poison Control handy too. Like OHSA says "Safety is No Accident".

When setting your materials and tools (brushes, mixing bowls, etc.) be sure to have a clean area to work in with room to move around. Good ventilation is key too. Be sure all your chemicals are labeled so you know exactly what you poured. You don't want to mix things up in the flurry of activity that will follow.

When you are dealing with a model ask them questions to insure a positive experience for both of you.
1) Are you claustrophobic? If the answer is yes, then a full pour mold that covers the face is out of the equation. You might be able to proceed with a sectional casting, depending on their level of comfort.
2) Do you wear contacts? If the answer is yes, they should be removed. As material is applied, it can get heavy on the face and body. Weight = pressure & Pressure = discomfort.
3) Are there any medical restrictions I should know about? Difficulty breathing, especially through the nose, or other degenerative conditions can prevent the person from sitting for the entire duration of the casting.

Be safe and through as you explain the techniques of application, the timing and above all the necessity for your model to not talk. Communication should be delivered through thumbs up and thumbs down. A neutral expression is desired for the optimum casting. All jewelery should be removed, especially facial piercings. Also all facial hair must be shaved. Better to shave it than yank it.

Make sure your model is comfortable and the job will go alot smoother.

When applying a bald cap it's important to ensure correct placement. It should be along the hairline and basically frame the face to allow for maximum coverage of the material. Long hair should be slicked back and pulled flat into a pony tail. For this mold we used a latex bald cap, but they also make them in vinyl for those that are allergic to latex. This is important to know, have a vinyl bald cap as a backup in your kit. Make sure you are covered if you're model has latex allergies.

For this basic face cast, the bald cap is extended OVER the ears. When doing a head cast with ears, it's very important to build up a ridge of derma-wax behind the ears to prevent Undercuts. Undercuts are like a lock to your mold, preventing a smooth and even pull. When casting ears safety steps should be taken to prevent any seepage of materials into the inner ear canal. A small piece of cotton gently inserted into the ear and covered with derma-wax will do the trick. That's for another head casting entirely though.
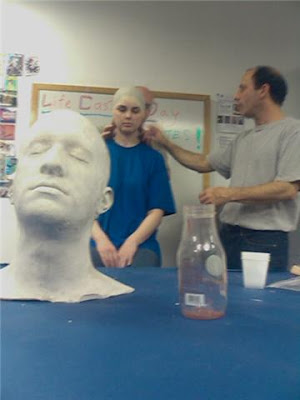
Here you can see the bald cap placed on the model. Make sure that the bald cap fits the size of your model. A cap that is too large can be trimmed, but if it tears, it's like a crack in a windshield; it'll just continue to spread until you replace it. The bald cap is glued in place with Prosaid, a cosmetic adhesive, applied with a small brush, on both the skin and the bald cap. Spirit Gum is the old stand by, but can be more difficult to remove due to its sticky composition. Make sure that your bald cap is secure along the neckline around the ears. A word of caution as you proceed. The cap has the same elasticity as a rubber band, so don't accidentally "snap" your model.

Apply a thin coating of petroleum jelly to the bald cap, but not on the hairline marking. Marking the hairline can be done with a Sharpie marker by following the natural curvature of the hairline. By leaving the marking clear this will transfer to your algaenate mold, indicating where to stop and start in regard to the scalp. Mark behind the ears as well, since they will be obstructed in the positive (finished piece) of your mold. This simple step eliminates the guess work of forgotten facial symmetry. By covering the bald cap in petroleum jelly, it prevents the material from unnecessarily sticking to the bald cap. Also apply a thin coat to the eyebrows. Don't grease them completely flat as this will cause air bubbles in your mold. With a small brush, petroleum jelly can be applied to the eyelashes like mascara to prevent from sticking as well. A great tip is to outline the model's neck in packing tape from their shirt collar to their skin. This prevents any material from seeping down the front of their shirt. The ladies will love you for this.
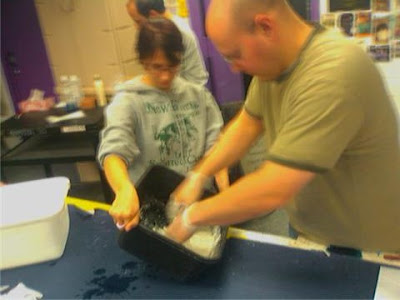
We used a PGC (Prostethic Grade Cream) Ultracal 30 which contains more algaenate for finer detail. The 30 refers to its work time, meaning you have roughly 30 minutes before it's set and unable to be further manipulated. Here I will refer to a few certain terms. KICK is the gelling stage, when the material begins to solidify. VULCANIZATION is when the material is basically solidified and unable to be worked with further. At this stage you may still feel a bit of heat emanating for the material. This means it still retains moisture. When it is completely CURED it will be solid and cold to the touch.

Think of this material like concrete. How do they build a bridge? They pour it into water and it activates, forming an irreversible bond. Ultracal, like concrete, is exothermic, meaning it generates a certain degree of heat as chemical bonds are formed. This is why you never apply plaster directly to human skin. It contains gypsum, a exothermic compound capable of burning and causing bodily harm. When the bond is completely formed, the material cools and settles.

Keep this material stored in a dry, cool environment as it begs to attract moisture. Water is the catalyst. You can mix the Prosthetic Grade Cream in a tub with water. Less water mixed in = shorter curing time meaning you will have less time to work with the material before it sets. More water = longer curing time meaning more time to work with the material before it sets. This is important to know as with mold making that materials = time and time = money. You're basically looking for the consistency of pancake batter. It helps to wear gloves (vinyl ones help for those looking to avoid latex allergies) so that your hands can be clean in an instant for whatever pops up. Make sure to have a box handy with your other materials.
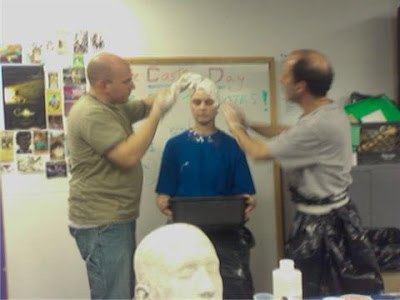
Make sure your model's wardrobe is covered and you're not working in your Sunday best. This will get messy. Cut trash bags make great capes and aprons. Once your mix is at the right consistency, begin applying from the top of the head working downwards. Gravity will make the viscous fluid work in your favor. Hopefully you remembered to ask your model to go to the bathroom before you got to this point. It'll be roughly 30-45 minutes before they're done.

You are only going to be applying the material to the "meridian point", meaning only the front half of the head. Going past this point will create harder mold to pull off of your model. In no way should you attempt to do a FULL head cast if this is your first time undertaking such a task.

Consistently ask how this feels and if everything is ok for your model. Talk them through it as you apply material to each section of the face. This combats all the odd sensations they're feeling right now. BE ABSOLUTELY SURE that you DO NOT COVER THE NOSE. You are covering the mouth and this is the only way they can breath. DO NOT use cut straws in the nose. This is awkward for them, and poses the risk of you bumping a sharp object into their nasal cavity. Also it can have a detrimental look on your casting. The nose will be the last piece covered with material.
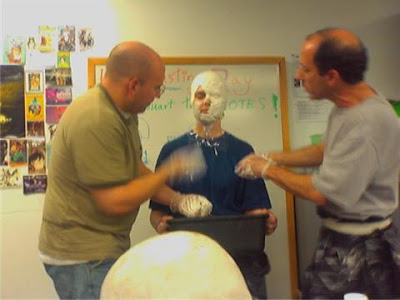
As your model continues to give the thumbs up, proceed at a quick and even pace. Smooth along the eye sockets to flush out any air bubbles. They like to hide in the regions of the mouth too. As the Ultracal drips along the neckline, catch it in your hand and place right back on top of the head. Now you're maximizing your product rather than just letting it spill on your model and the floor.
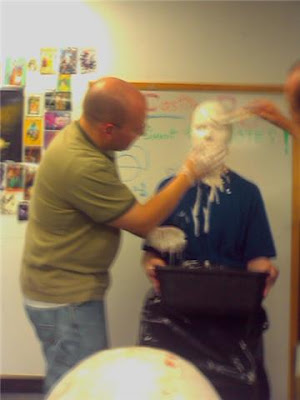
At this point the Ultracal began to kick and quickly vulcanize. Plaster bandages were dipped and wrung through water and applied over the Ultracal. Using cold water allows for more work time, warm water speeds up the process. This creates a MOTHER MOLD, which is used as an impressioned mold of stronger material for the mold that sits within it. Think of it as the protective shell that helps keep the shape of the Ultracal mold. Be sure to check with your model as the plaster will begin to generate heat as it begins to dry.


Here you can see Carl quickly pulling off the mold. The issue that arose was that Tam's left nostril was partially obstructed making her breathing more labored. By consistently asking her level of comfort she indicated that is was uncomfortable to breath and wanted pulled out of the material. This was all done in less than 3 seconds. ALWAYS PAY ATTENTION TO YOUR MODEL!


Here is the mold of Tam's face. Immediately you can see the fine detail the material can capture as well as the hairline marking. Ideally without the forced pull, 6-8 layers of plaster bandages would make up the Mother-mold. This creates a solid form as a base for the "positive" casting.


Here is some closer detail of the pull. You can see some of the distress in the nose area. Now this presented a unique opportunity to the class to see how Carl would handle this situation. If the Ultracal kept drying, the nose would become a larger problem. By wetting some paper towels and placing them over top, he was able to add a few moments to run to his supply room. There he grabbed some sculpting putty and was able to plug the hole from the reverse side. The other step to this dilemma would be to section off the nose and recast it separately. By using the clay first, he saved himself about 80% of work and the need to recast the model.
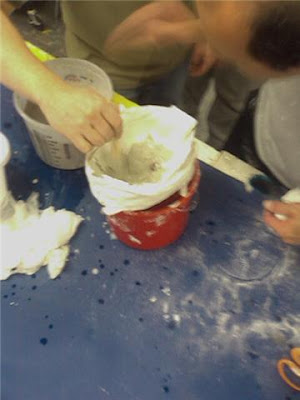

Next a small amount of plaster was mixed to pour into the mold. As the Ultracal dries it also shrinks and can distort the original shape of what was casted. Immediate casting of your positive guarantees optimum results. First apply a thin coat to produce an even distribution and prevent weight distortion. This also helps prevent any air bubbles from simply dumping the mixture in.
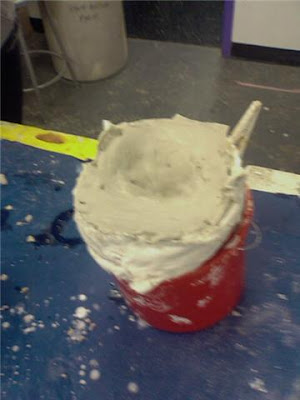

Be sure to secure the edges of your mold together. Clothes pins around the sides will keep them in place at the edges that want to unfurl. As the material cures, you can perform a simple "scratch test". Take a fingernail and see if you can make an indentation. If you can, let it sit. If you try to pull it, it'll come out like wet cake batter.
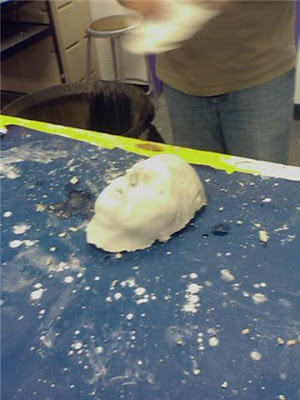
Once it's dry, you can pull your positive! Be careful as the edges can be sharp. You can file them down or use sandpaper to take off the sharp edges. Don't start bleeding now.


Here Kevin takes a hammer and screwdriver and gently "chases" out the undesirable pieces, meaning he's cutting away what he doesn't want in his positive mold. This included the extras pieces that inevitably cast through with the nose and some air bubbles that popped up. It's not every day you can legally take a hammer to your wife's face. From here Kevin can now use molding clay to sculpt directly onto his casting, creating a variety of appliances like custom fit scars, eye sockets, and other distorted fun stuff. You then cast that face to create another mold and pour another positive. That's how you can create custom fitted appliances, masks, and other fun stuff that will fit the facial structure of your model.

Make sure that your positive is completely dry. If you attempt to use any epoxy it won't stick if it's still exothermic. Basically if it's still warm, there's still moisture in there trying to dry out. To cast a woman you're gonna use about 3/4 of a lb of PCG and for a man about the full pound. And yes, it is sold by that weight. You can find this online or at most sculpting and art supply stores. For this type of mold you'll use roughly 4 rolls of plaster bandages too. Your brushes and most other beauty supplies can be found at any beauty counter and other supplies (gloves, trash bags, mixing tubs, etc) at your local pharmacy or hardware store.

In regards to cleanup, allow the Ultracal to dry and it peels right off. A shop vac or broom will sweep up most plaster dust. Use Detachol, Bondoff or Alcone's 244 to help remove the bald cap and the Prosaid holding it in place. Be gentle and weary of that aforementioned "snap". Pitch anything else in the garbage.

And there you have it, my very first experience with life casting (outside of my own hands). Next week we were promised to be issued our own make-up kits and dive back into scars and bruising. And yes, Tam is completely ok, and I'm sure willing to be experimented on further by her husband. The joys of matrimony.

Saturday, October 10, 2009

Carl Paolino - Instructor Extraordinaire

So I wanted to include a little bit about my instructor for this class I'm taking. His name is Carl Paolino and you can find his website here. He not only does special effects make-up, but also fabricates props, costumes, and even animatronics and stop motion. Featured here is some of my choice pics from his work. All photos and work belong to Carl as does all the glory.


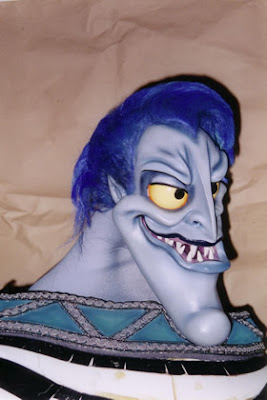
Head Mask of Hades from Disney's HERCULES ON ICE

Hanson vs. the Spice Girls from MTV's "CELEBRITY DEATHMATCH"

The N'Sync Marionette Puppet rig worn by Jimmy Fallon for the 2000 MTV Video Music Awards.

Antlers for FALL OUT BOY's "Sugar We're Goin' Down" - Video here

SKULL FACE from a Verizon advertisement

For a short film entitled DELIRIUM AND THE DOLLMAN


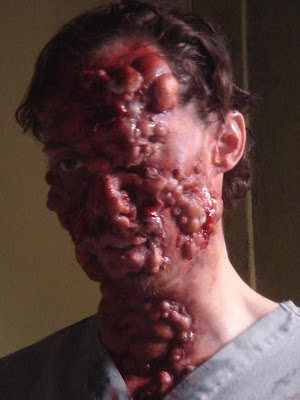
He wrote and directed a feature entitled THE SICKNESS. You can see the trailer here. Below is a sample pic of the effects featured that I hope to learn.

What spurred this post, was an email sent to the class with a link to his latest commercial that you may have already seen.


He fabricated latex appliances and face paint to create the look of singing pepperoni.

I'm eager to soak up what I can and learn the tips and tricks I need to not only make it in this profession, but to thrive and deliver consistently quality work.