One of the most original, tongue-in-cheek, gore fest flicks I've seen this year has to be THE TAINT. You can read my review of it over at BloodSprayer.com. It's the type of film I love introducing to friends because of how over the top it is; it basically is the style of cinema that will determine if we'll be friends or not.
For those unfamiliar with this film, here's the NSFW trailer:
I showed the film to some friends and one of them, Kevin Polyak, instantly fell in love with it. He wondered if I was capable of producing a mask from this film for his Halloween costume. Basically a drunken gauntlet was thrown down in my mind and I was determined to make his challenge a reality. The mask he wanted was from a flashback sequence when a character is forced to duct tape their own ripped off face back onto their head.
Reference Still from THE TAINT
I decided to take the look of the mask a bit further. I brainstormed what this face would look like for the possible sequel to this film. I wanted to show the skin in a bloody, leathery state; contorted and disturbing. This would be my own version of Film Fan Art. What I envisioned was a cross between Freddy Kreuger, the Cropsey Maniac, Leslie Vernon and when actor Lou Perryman gets his face ripped of in TEXAS CHAINSAW MASSACRE II. Basically all the terribly wonderful things that delightfully taunt my imagination and memories.
I knew that this was going to be my first attempt at making a mask so I wanted it to be special, I wanted it to be custom, I wanted it to be one of a kind. I decided that I wasn't going to go about the traditional means of sculpting and pouring a mold. I was going to do a layer by layer build up of liquid latex from a Ultra-Cal casting of my own face.
I gobbed on the latex knowing it would take longer to dry this way, but give me a rippled foundation that I would make look like fat. It would be later that I would augment it further.
Here you can see the first layer dry. Not a bad start, very Toxic Avenger, but that's not what I was going for...
I had previously poured strips of liquid latex on my arm and as it dried, I would peel off these layers and stretch them over the face. I would definitely do thinner strips if I made this same mask the same way again, but that ship already sailed. Still it had a very distinct look versus if I had made it appear droopy and saggy. I wanted HUMAN BEEF JERKEY!
I filled in cracks and crevices with sponges and brushes, making sure not to lose the basic elements of the face underneath my half-cocked scheme of a technique. You have to make sure you have your ability to see, speak, and breathe with a mask, and if you know Kevin that means drinking too.
The mask was really taking shape with over a dozen layers of liquid latex cured throughout. It was now time to peel away and start the process of painting.
Here is the pull of the mask from the front view.....
.....and here is the back/inside of the mask.
I trimmed the edges with scissors to scale down some of my excess, but the idea was that this mask was to cover a good sized chunk of the face so I made sure there was a little extra along the top of the forehead and beneath the chin. My version of old school Trick 'r Treating theater if you will.
I started painting with pinks and purples, knowing that this would be the basis of what I would build and blend from in regards to shadow and composition.
I soon started adding more reds and browns to the mix, darkening certain areas and bringing the colors more to my liking.
I blended and blended, but I knew I would need some highlight to make the piece really punch. My secret weapon? Nail polish. Yup. I used a clear pearl glaze to add a sheen of viscous and sliminess and I used fire engine red for blood, which looked fresh and tacky even when completely dried. I added a couple layers of blending on top of this to tone it down and push forward.
To hold the mask in place I created a band from stretch elastic ribbon you can buy at any craft store. But I also wanted to hide this as well as utilize this necessity. I used grey Gaff tape, instead of Duct tape and folded it over top of itself and slipped the elastic through all the way around the mask. I chose the Gaff tape because it is porous enough to accept paint and aging where Duct tape would wipe right off.
A closer look shows how the "tape" hides the band.
Here I am wearing my own creation, moments after completion. It's definitely a face only a mother could love either way.
And like any good artist you have to make sure you sign your work. I probably would've stamped into the mask for this, but a black Sharpie has never failed me before.
It was quite fun to see the changes the process took as this project came to a close. I learned several new techniques and ways to go about creating the look I want and how to avoid the look I don't want. I now plan on tackling the craft of mask making on a larger scale with a sculpt and mold in the near future to produce a limited run of original creations.
Kevin completely forgot that I had promised to make him this mask. It arrived just in time for him to enjoy the Halloween weekend and not be completely lame without a costume. And that's what you should walk away with if anything from this article; not wearing a costume on Halloween means you are super-mega lame. That and always keep your promises.
Here's a couple of pics of Kevin in all his glory Halloween weekend.
And you thought the rats were the scariest part of the NY Subway...
Kevin and his special lady friend
Now here's hoping that they do make a sequel to THE TAINT!!
So needless to say Halloween is one of my favorite holidays of the entire year. It's the one day in your life throughout the changing seasons that you can be what ever you want to be. Adults tap into their wallets while children tap into their imagination; there are few that can do both. I like to eat & drink on Thanksgiving and I spoil my nephews rotten come Christmas, but nothing holds a candle to All Hallows Eve.
Last year for Halloween I did nothing. I literally sat in a depressive funk like an over-filled emotional diaper. I didn't go out, I didn't talk to anyone, hell I didn't even watch a Horror film. This year I decided to get off my ass, exert some effort, meet up with some friends, and have a good time. Like Tony the Tiger taught me, "Show 'em you're a Tiger, Show 'em what you can do!".
The gene pool needs some chlorine.
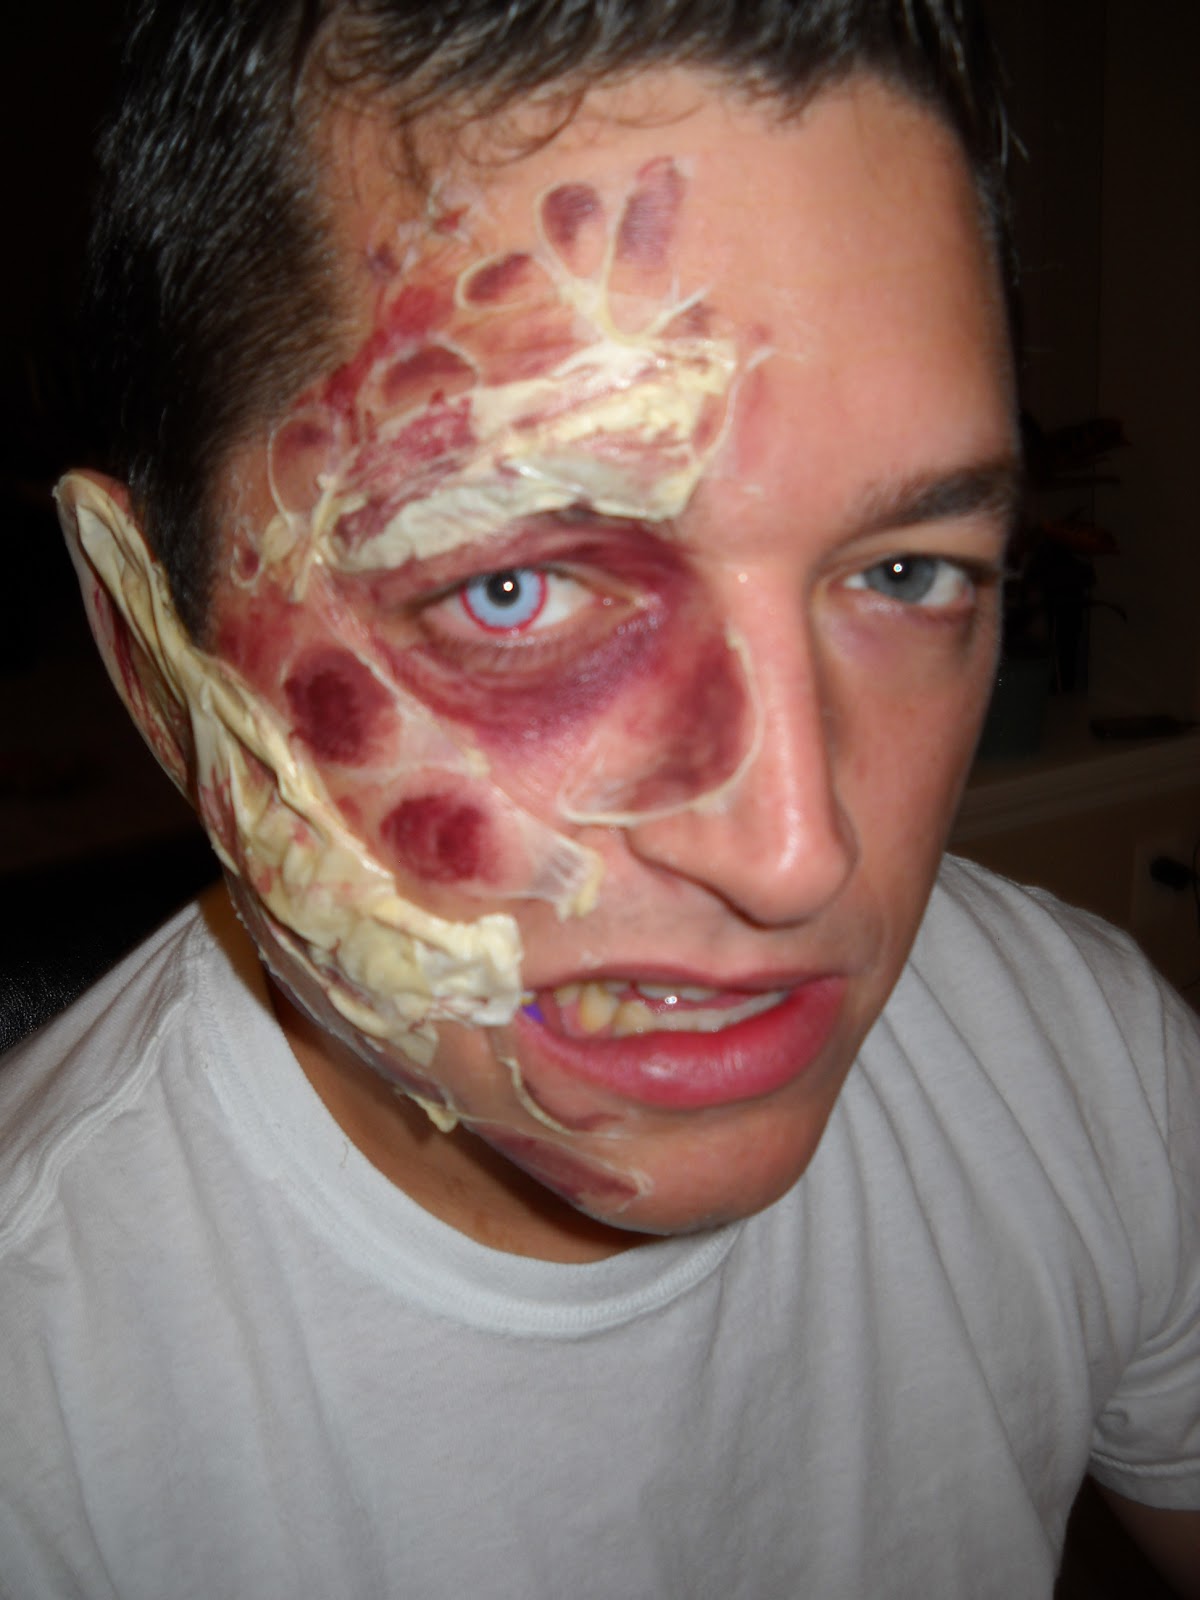
This is what I look like normally, kinda like Jimmy Olson crossbred with Astro Boy. My general rule of thumb on Halloween's past has been: no face make-up, no masks, and no costumes that restrict and can't quickly be converted into a normal outfit. This year I decided to break some of my rules and flex my FX skills on myself. I recently stumbled back upon Yellow Barrel of Magic, a shop specializing in illusions, costumes, and my favorite; special effects supplies. Now as an adult I had the coin and knowledge to go in with gusto. The shopkeepers were more than friendly and surprised at my know-how in what I was looking for and purchasing considering all the other folks looking for Pop Culture costumes.
I wanted to show my Ohio based friends what I could do and what I learned while in New York. I pick up a Woochie foam latex appliance and some black blood, which I had never used before. I was quite excited and went on my way. So here's a little equation to explain my costume...
I had to hand paint the foam latex appliance and I decided to alter things a little bit. I wanted the ripped flesh look, but I didn't want all the deep reds and purples and blue veins. I opted for something more akin to my own flesh-tone a bit lighter, which I believed created a creepier look. I used my Ben Nye reds and some Revlon blush to help smooth it all out. I feathered my edges with a little grey just to imply the onset of bruising/decay and help the blending of the edges of the appliance to my skin.
I've never really put an appliance on my own face before so this was a little bit of a challenge. I used Pros-Aide and started at the nose, working to the eyes, cheeks, mouth, forehead and edges. I wanted full range of movement with my face and I was able to learn how half an inch of placement in one direction or another can alter that effect.
I had an old white under-shirt that absorbed all the black drippings as I applied a generous layering of the Black Zombie Blood to my bottom lip. I really enjoyed this stuff and it definitely anchored the look of it rather than just plain blood, though I did use Fresh Scab make-up along the edges of the appliance to give it a ripped away look. The contacts took it to a whole different level - definitely reminiscent of 28 DAYS LATER and the R.A.G.E. virus. Needless to say, I was very pleased with how the different combinations created a whole new look.
Now the costume I created from this Saturday I used on that "Official" Halloween. You can check the look of all that by clicking here.
Now let's shift gears a little into reverse...
My damn good friend Dan wasn't gonna dress up, not quite in the Halloween spirit, but I quickly twisted his arm and said I could turn him into a zombie in 10 to 15 minutes if he just sat there. He said as long as he could drink, no problem. I asked him to pick a color - he went with BLUE. This was gonna be a little more challenging than I anticipated. I didn't want to make him look like a resurrected Smurf.
I knew that a brown base would balance the blue and provide a a nice dirty look. I used purple around the eyes and outlined them in a black liquid liner to make them pop. I used old cut up pieces of latex gloves to cover the eyebrows and attempt to build a sunken look to the eye by curving it around to the underside of the eye. I applied liquid latex to adhere it all down and smoothed some out to peel away later as rotting flesh.
So quick and so cheap - And that's just the make-up!
I added some Fresh Scab to the peeled latex and gave the whole face a light coating of Vaseline. The Vaseline made everything look slimy and wet and made the reds stand out against the blue a bit better than I was planning, especially for only about less than 15 minutes!
Two Zombies that will respect you for your mind, ladies.
I was so creepy looking that women would not look at me. Men took two steps back thinking it was some strange and elaborate mask I was wearing. I think I pull it all off.
That's not all, the adventure continues....
My other good friend A.J. had a buddy that wanted to go as the Heath Ledger JOKER from Nolan's THE DARK KNIGHT. He came with his own store bought make-up kit and I kinda chuckled. The figure on the front of the packaging was wearing a mask, yet here in a plastic and cardboard coffin were two latex appliances, some spirit gum, a red cream crayon (completely dried out), a black cream crayon (dried out too, and a tube of white cream make-up (which we could actually use). The main reason he bought this kit was that it included the disheveled green wig to complete the look. I thought rather than fight the devil, use his pitchfork. I tossed the red and black, and went to work putting on the latex appliances. All in all they weren't that bad - a tad thick and not quite as feathered at the edges, but they did their job.
I adhered the prosthetics to his cheeks and made him move his mouth around to find the closest spot to place these pieces so they wouldn't bend and come off or restrict his movement. It's Halloween, you gotta be able to drink to no matter what! I helped feather the edges with torn pieces of tissue paper and a bit of liquid latex. To apply the prosthetics themselves I used Pros-Aide for a stronger grip to the skin.
The key to the Ledger make-up is not so much what you put on, but rather what you put on first and what you take away. Start with the black and build a solid, dark circle that fills the complete socket. I used a longer tipped make-up brush to get to the eyelids and lashes to ensure a complete look. Ladies, I have to had it to you; you don't flinch nearly as much as guys do when bring a brush to an eye.
Looks like Uncle Fester needs a vacation.
From this point I had the foundation of the look I was going to build from and this is the key principle that a lot of folks tend to miss or mess up. I painted in the lips with red, brown and a touch of black to add shadow and depth. I used make-up sponges to smear the eyes and clear away at the brow and temples.
I began smearing the black and distressing the white by pulling it away from the face. This is the largest part of the problem people have with replicating the make-up. It's not supposed to look perfect, in fact there are parts that are supposed to be rubbed off entirely to show the wear & tear of being the Prince of Mayhem in Gotham City. You can check out my previous Nolan style JOKER make-up design from another article by clicking here.
To fix the wig and give it that greasy look, I rubbed a generous helping of K-Y Jelly through the strands. I knew that it would look wet and great but eventually dry and hold the look. This is dedicated to all you old school punk rockers out there.
Paired with a full purple suit, he sure looked the part. It also helped that he had his wife in on the action, especially when it came time for the Costume Contest. Here is the Grand Prize Winner with his wife that went as Harley Quinn, a pretty rad couples costume. He won a $100 Bar Tab!!
So what was the catalyst for this make-up mayhem?
What initially started this whole make-up filled debacle was that my other friend AJ wanted to go as Two Face from Nolan's THE DARK KNIGHT as well. He was going to be bar tending that Saturday night and his boss/owner was going to be Batman while all the other bartenders and staff were going as Batman villains. AJ was determined to blow them all away with his costume and called me for a make-up test to see if I could pull it off. Drawing inspiration from the comics, films and other resources I was up for the challenge. I mean how hard could it be??
I went to work covering AJ's face in liquid latex and as it dried, peeled it back for pock marks and skin distortion. I used browns and reds for a burnt effect, but soon found myself using too much purple for some reason.
The bruising and burning were something I knew would sell the effect. Instead of all that ridiculous nose putty from the video I used strips of a cut up latex surgical glove to mask the rubber bands that were going from AJ's mouth to his ear (That idea was a winner).
Blend.
Blend some more.
Blend even more after blending.
I really enjoy the look of the ear sticking to the neck.
This look required so much blending to do by hand. Honestly I would've preferred an appliance and I can even see why they use green screen, but dammit this is art. If you challenge that, pick up my brushes and try it yourself anytime.
I added more red and purples and blended in a small portion of black creme make up. I dabbed a bit of Fresh Scab to heighten the look as well. He definitely looked bruised and battered, but not entirely burnt. At that time AJ had to get ready for work, but not without showing off the results to his wife and friends.
The reactions were encouraging.
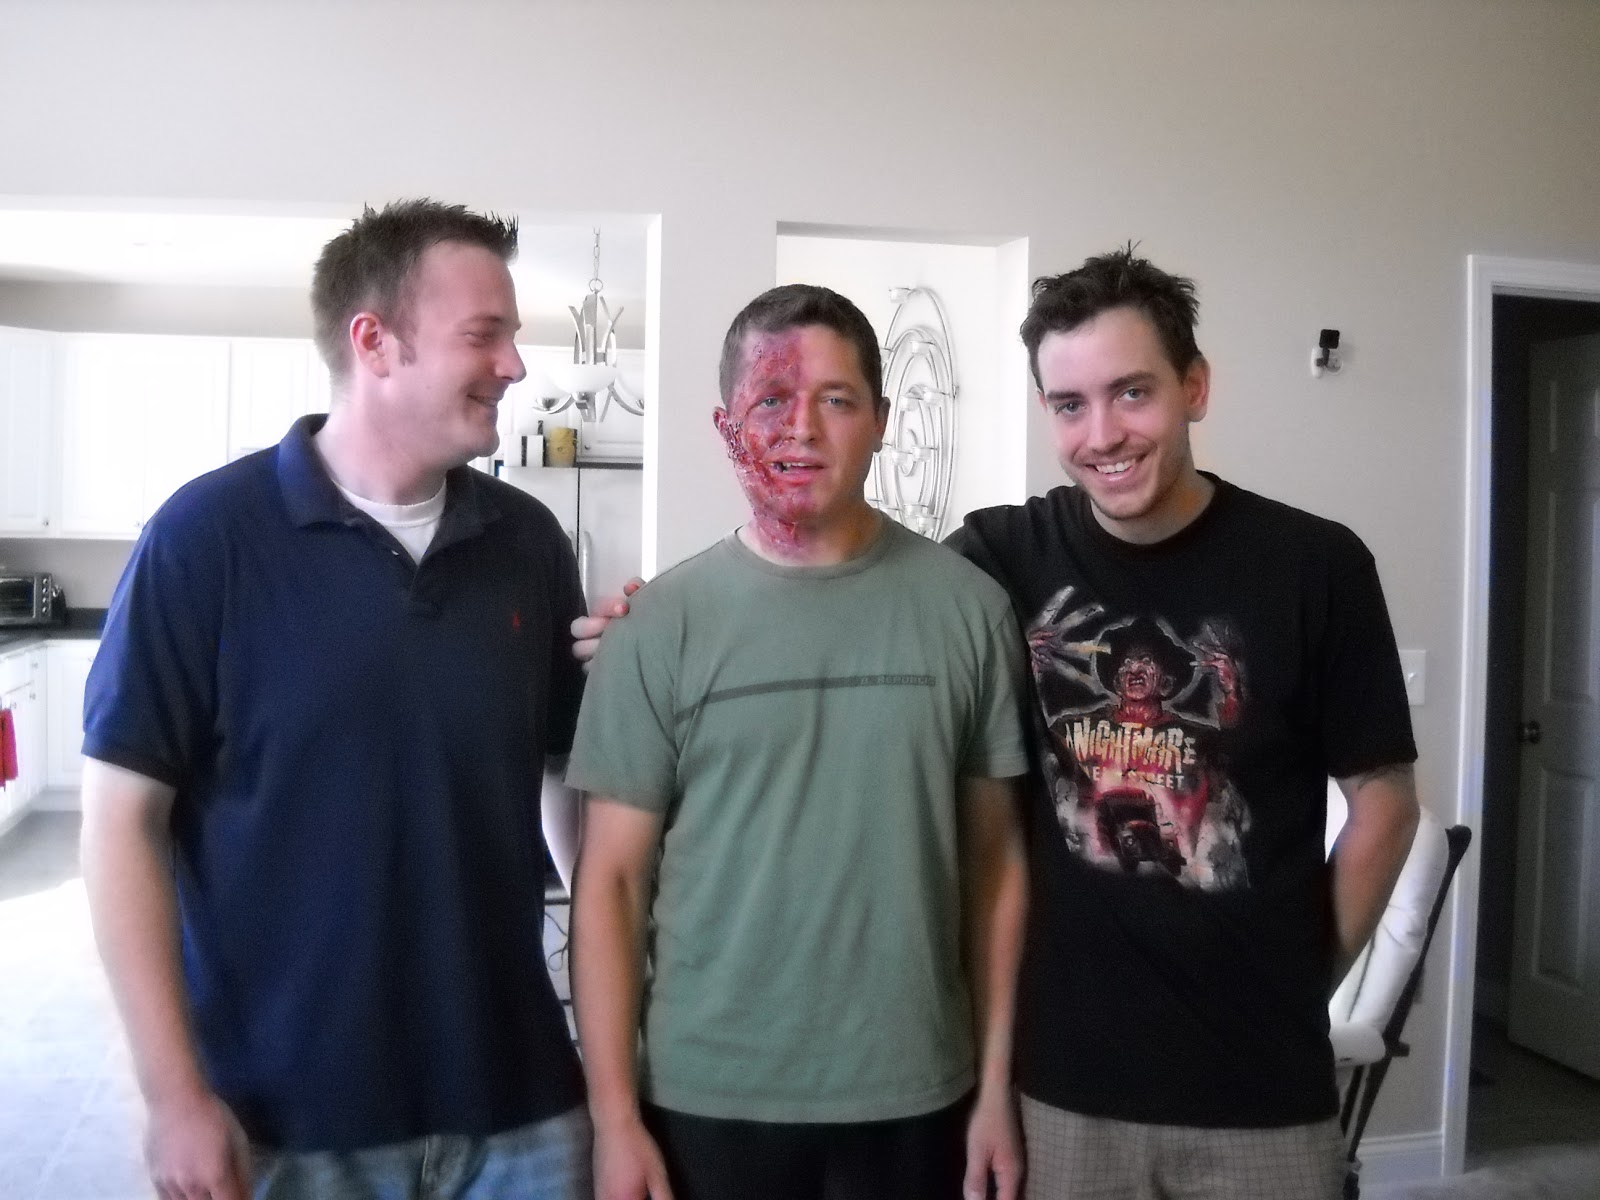
The Three Amigos - Dan, AJ, and I
All in all, this wasn't a bad first attempt. Between breaks for water, bathroom, and trying different angles and supplies, this look took about a little less than 90 minutes before AJ had to rip it all off and go to work. But he knew that he was going to have the most kick-ass costume behind the bar. I felt that this look was a great jumping off point, but it was a bit more Freddy Krueger than Harvey Dent. I came up with some ideas and AJ chimed in with what would work with his comfort level and the timing. Remember to always check on who's in your chair, friend or not, they're a breathing canvas that deserves your respect.
So here's the real run through of the FINAL make-up with changes implemented and the clock ticking...
I came over earlier for AJ's make-up and I'm please to say we knocked it out, start to finish, in 60 minutes. To make the Q-tip & rubber band process work, I placed a clean make-up sponge on the end of the Q-tip to make it more comfortable, to puff out the cheek and to help with some of the natural drooling that occurs when you hold your lip back for over ten minutes. In the rubber band application, I made it so that it could be more easily removed from the ear and he face entirely.
AJ also visited Extreme SFX.com and purchased one BESERKER contact lens. This helped break his face into two distinct halves without being over-domineering and serve as a distraction to the rest of the make-up or costume. Again you can see my use of the the cut pieces of latex glove. This technique really helped with the transformation of his ear as well as connecting more of the scars to the face.
Evil VS Good
Here's a little before from the left side and......
.......here's the after on the right side of the face.
You can see where I stretched the skin more with the liquid latex and added more Fresh Scab to certain spots rather than all over. I also included more black and grey to simulate charred flesh. I had some white hairspray coloring that helped break up AJ's face into two distinct sections. He was going to burn half of his suit as well, but opted out instead for a I BELIEVE IN HARVEY DENT campaign button. It's those little touches that can really sell a costume. And of course he even ordered the distressed coin to flip. Why he didn't simply make one is beyond me.
AJ was definitely in his element as Two Face and received non-stop compliments on his make-up which meant I was able to drink with head held high and hopefully be commissioned again in the future.

 Reference Still from THE TAINT